WordPress is the most famous CMS out there for you to create a website quickly. Even if we don’t speak about content management systems and website development in general, WordPress still powers more than 43% of all websites today. This tutorial will answer some of the most common questions: Is WordPress free? How you can create a free website on WordPress? You can also learn WordPress in a week and grow your business online. Hence, let’s begin.
Table of Contents
What is WordPress?

WordPress is the most popular CMS in the world. It is open-source software, a user-friendly website building, and a managing platform. One of the causes that most CMS users love WordPress is that it doesn’t need to have coding skills to create a website. It authorizes you to make simple to advanced websites. It has a large number of WordPress themes and plugins to increase the look and add functionality to any website.
There are two different kinds of versions WordPress.com and WordPress.org. WordPress.org is open-source software that helps you in building blogs and websites and manage their content. WordPress.com is an online platform that allows you to create websites on its self-hosted servers using WordPress as the content management system. Automattic owns the service, and the platform works similarly to Tumblr, Blogger, or Wix.
Is WordPress Free?
WordPress is free and open-source; users can freely utilize it for their websites. You can download WordPress.org, free WordPress software, without spending money. Open-source software is publicly available. WordPress itself is available through what’s called a General Public License (GPL). That type of license ensures the following:
- You can use WordPress for any objective you desire.
- You can change the software in any way you see suitable.
- Redistribution of the source code is allowed.
- You’re free to enhance the program and remove those changes.
5 Steps To Create a Free Website With WordPress
So it’s time to explain the process of creating a free WordPress website. For that, you would need patience and carefully follow the instructions below. So, let’s get started.
Choose a Domain Name & Hosting Plan
Before making a WordPress website, the first and most important step is to choose a unique domain name. A domain name is the online address of your website and holds your brand identity. It stays unchanged so always choose carefully your domain name. You can follow the steps to choose a domain name:
- Keep a domain name that is easy to remember
- Keep the domain name precise & short
- Make sure the domain name doesn’t include any hyphens or numbers
Buy A Hosting Plan For WordPress Website
After choosing a domain name, it’s time to choose a hosting plan from a reputable hosting provider. Web hosting is a service that makes your website accessible on the internet. When you get a hosting plan, you rent space on a physical server to keep all the website’s data and files. There are many hosting providers available in the market. But, if you are looking for the best and cheap hosting plans, Temok would be the best choice for your business.
There are different kinds of hosting plans available at Temok. Choose any desired hosting plan and experience the wide range of secure & scalable hosting solutions. If you don’t have technical knowledge, there is also managed WordPress hosting available at Temok. Managed WordPress cloud also optimizes your website and handles security, backups, maintenance, and performance improvements.
Download & Install WordPress

After choosing a domain name & buying a hosting plan, you must install and download WordPress on your web server. You can see different tutorials to learn the installation process of WordPress.
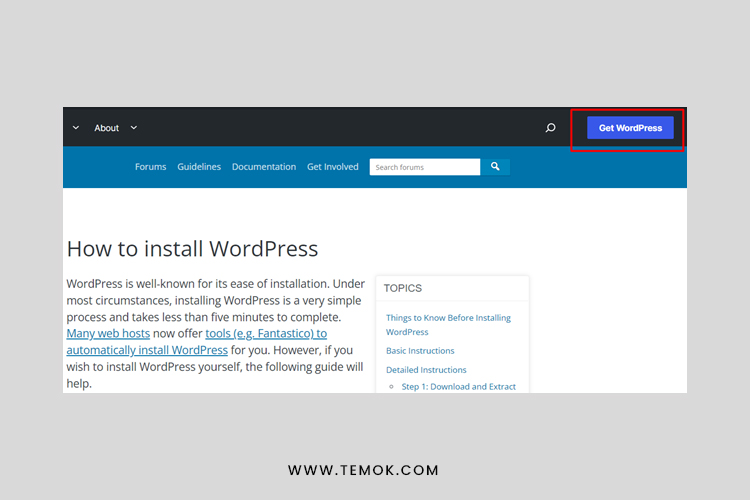
Click on the button ‘get WordPress’ and download it.

After downloading WordPress.org, extract the folder and put it in the XAMPP file on the local server.
Open the localhost/PhpMyAdmnn/ in the browser and click on the databases.

After clicking on the databases, create a new database with a name.

After creating a database on your local host, the screen will appear on your screen with different languages. Choose your desired language and click on the ‘continue’ button.

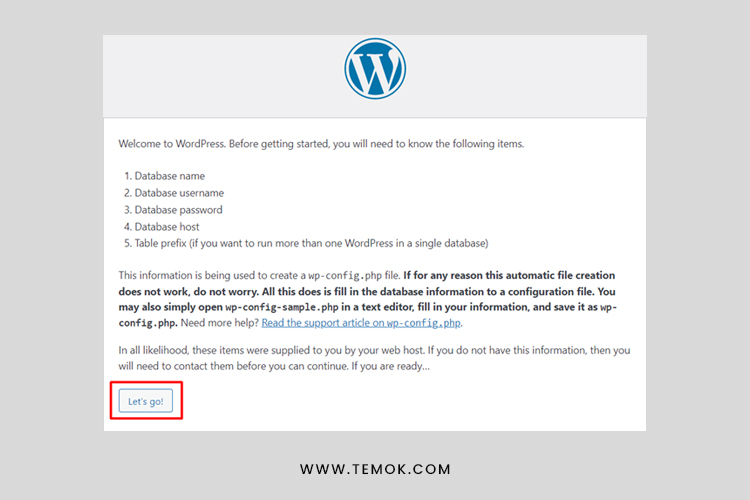
Now click on the ‘let’s go’ button.
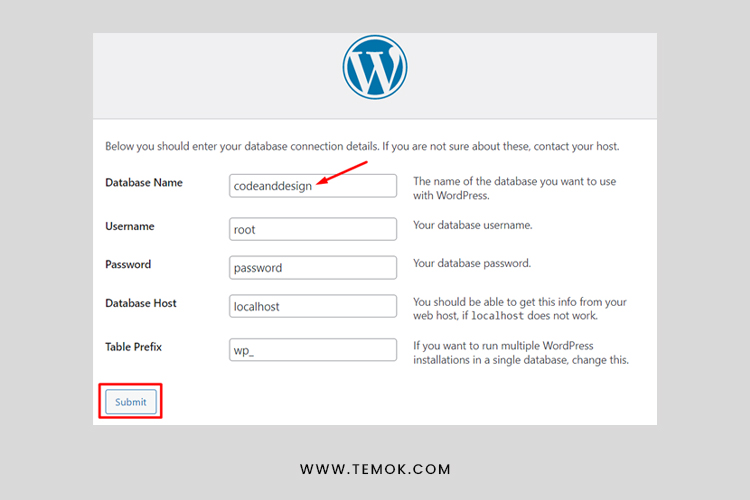
Write your details here such as username, password, & database name. After typing your details, click on the ‘submit’ button.
After that click on the ‘Run the install button to continue’.

After installation, you will see a display where you have to give your username, password, site title, and email and click the install WordPress button.

Here, the installation process of WordPress has been completed. You just have learned how to install WordPress on localhost. Now enjoy your newly launched website on your local host.

Customize General Settings
When you install WordPress completely, you’ll get access to your dashboard directly.
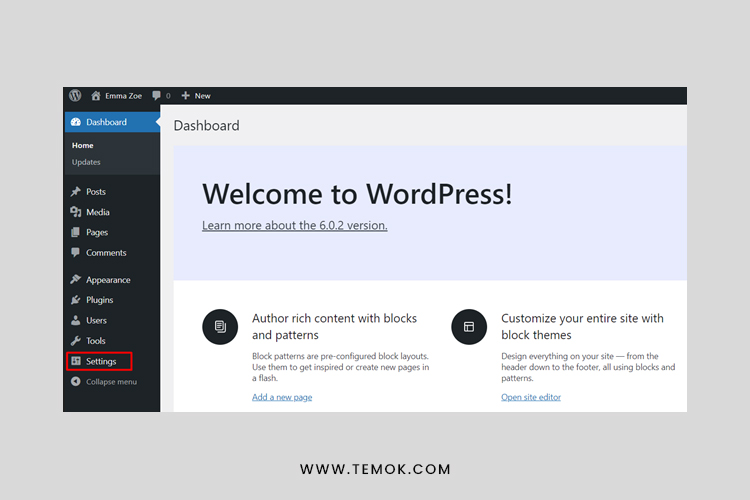
From here, you can customize the settings:
- Type your website title
- Set a tagline
- Setup your WordPress address and URL
- Tick mark on the Anyone can register
- Set up Date & Time format
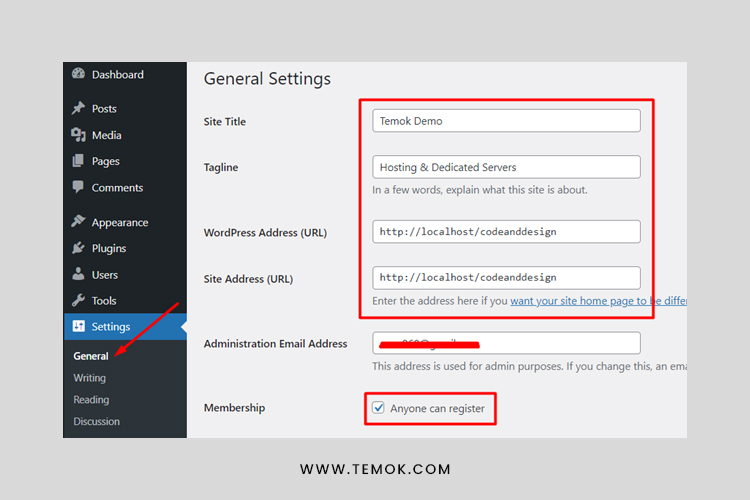

After customizing your general settings, click on the ‘save change’ button. Next, again navigate to the settings and click on the ‘writing’ option. Choose the default post category & post format.
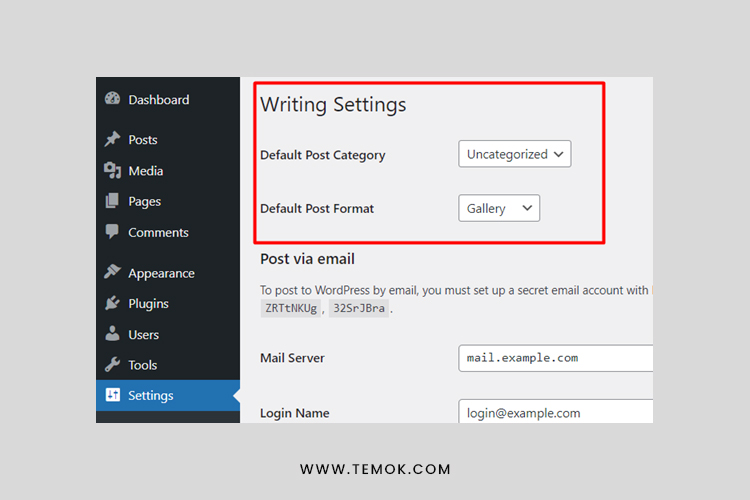
After customizing the ‘writing’ settings, click on the ‘reading’ option and you can customize certain things such as ‘home page display.
- If you choose the option – Your Latest post, it will show your latest posts on the homepage.
- But if you choose the Static Page, you can split the home page and blog. That means your latest posts will be added to the blog page only.
- Also, you can select the number of the minimum posts, so do like the post view.
- Remember to mark the search engine visibility at the starting stage (if your website is entirely new). Unmark it later when your website is fully ready.

After setting the ‘reading’ option, you need to set up your post’s permalink. For that, click on the ‘Permalink’ option. And then customize it.

Download & Customize Themes
After carefully completing the above steps, it’s time to download & install a good theme based on the type of your WordPress website. You can purchase a premium theme from various available marketplaces. But at starting, if you want to use a free theme, you can directly install it from the WordPress platform.
Because WordPress has a broad range of accessible theme collections. So it’s hassle-free to download and activate when selecting a theme for your WordPress site.
You can also filter the themes that you’re looking for. It is important to ensure you’ve chosen a suitable theme for your WordPress site. Otherwise, it will be a hassle for you, especially whenever you choose to customize it.

Choose your desired theme for your WordPress website and download it.

Now, navigate to WordPress Dashboard. Click on the appearance >themes. Upload the downloaded file, install it, and activate it.

Create Essential Web Pages
After choosing your desired theme, the next step is to create essential web pages. It is very easy to create and you can do this within a few minutes.
First, navigate to WordPress>Pages>Add new page>Enter the title>Click on Publish when all steps are completed.

By following this same process, you can add more required pages.
For example:-
- About Me
- Blog
- Gallery
- Home
- My Services
Well, here’s the complete front-end view of the demo website found in WordPress. Later on, you can customize & design your website to make it more attractive and beautiful.
Create The First Blog
After completing the all settings, now you can create your first blog and make it live for your website visitors.
First of all, navigate to WordPress Dashboard>Posts>Add New.
- Add a title
- Write post
- Add category, tags, feature images, and excerpt
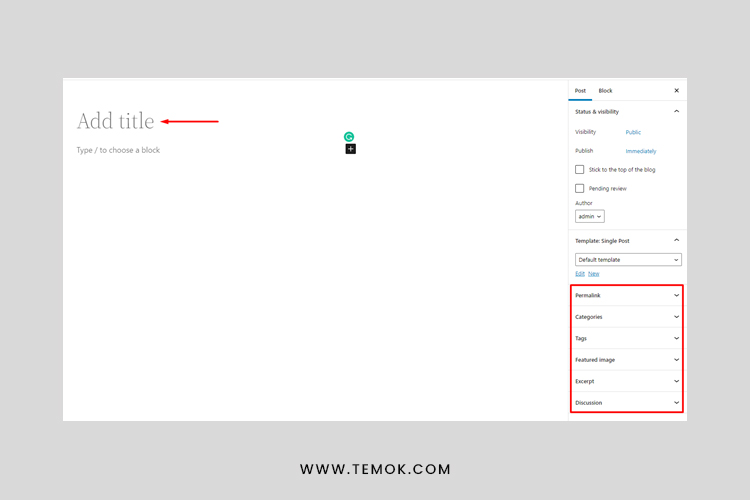
Add the title, images, and content to your blog.
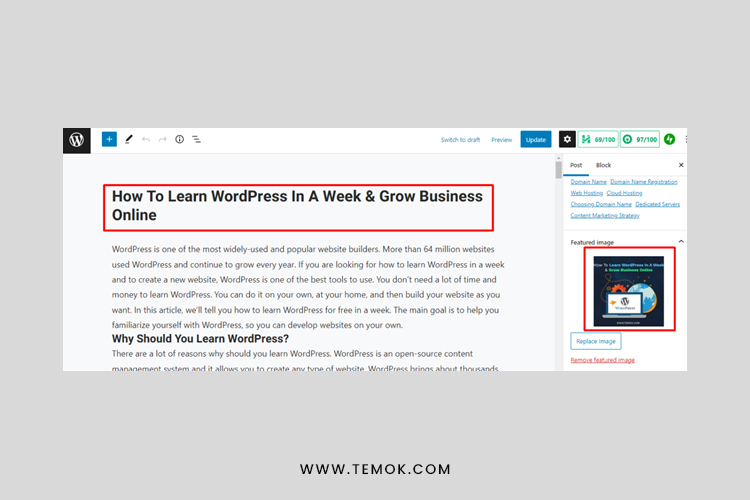
There are also many other options available. On the left corner, you’ll get a plus-like button. When you click on it, you’ll find many other useful options. For example, you can add paragraphs, lists, headings, images, and more.

When you have completed your blog, publish it.
How to Create a Header on a WordPress Site
The header is an essential part of any website. Most of the conversions & traffic are generated through an attractive header. Generally, a header contains social icons, quick navigation, important links and search button, and more.
So you must put all the main elements in the header and showcase them in the right place on the website and in a suitable way.
Essential Plugins for WordPress Website
There are many plugins for WordPress websites. There are three ways to install a WordPress plugin: automatically, manually, and through File Transfer Protocol (FTP). You can add plugins automatically from your WordPress dashboard by searching for your desired plugin and installing it with a click.
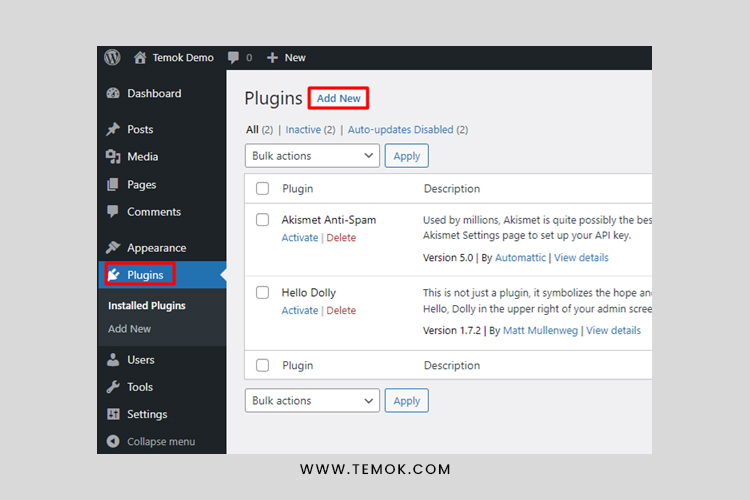
Plugins are a wonderful piece of software to increase the functionality of your WordPress website. The best WordPress plugins can help you add necessary functions, like speed optimization, live chats, and automatic backups. The right plugin makes sure your website is user-friendly, fast, and secure. Following are some plugins you can install:
Jetpack:

It offers various functions like security, content tools, visitor engagement, social sharing, comments, spam protection, and related post, and it also enhances the website performance.
RankMath SEO:
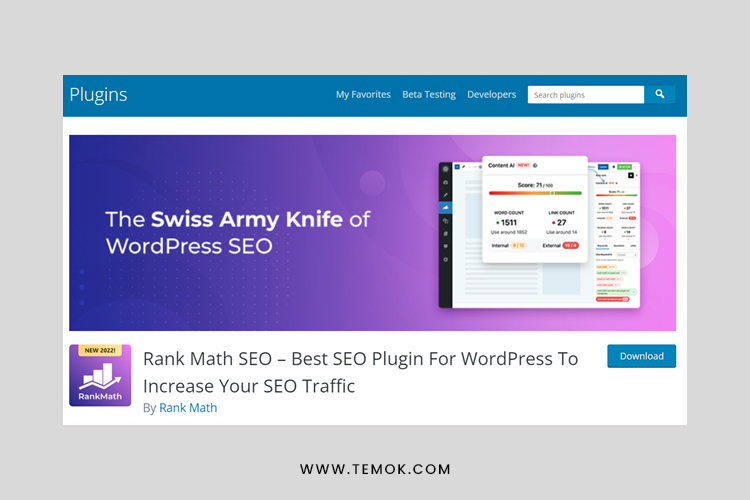
RankMath could be your top choice as it combines all the essential functions in one dashboard. It’s an all in all SEO tool that comes with some convenient features. For example, it can optimize your pages and posts and take care of your site’s Schema. Also, it helps you to add XML Sitemaps and gives instant insights about your website content. And this helps to make better decisions in time.
Google Sitekit Plugin:
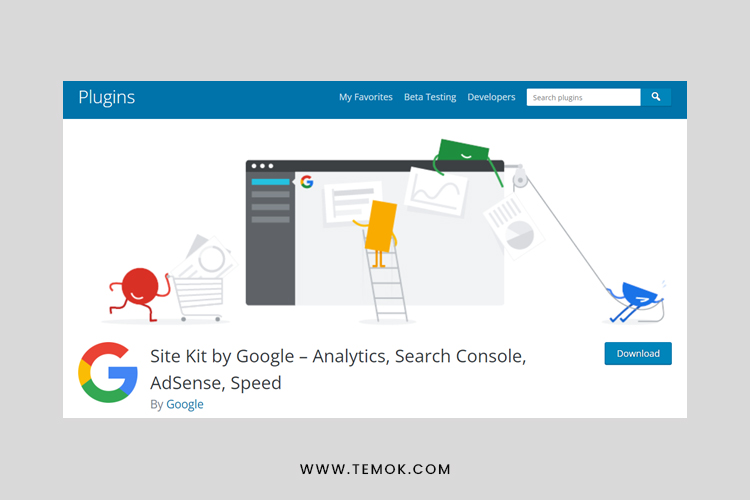
Sitekit is another sophisticated tool with some essential tools. You can use Google Analytics, Search Console, Tag Manager, Page speed insights, and more. Using this all-in tool, you can get unlimited features like tracking user visits, site popularity, insights about visitors, page or post-performance, powerful analytics, and more.
Conclusion
Is WordPress free? Yes, WordPress is a free and open-source content management system. There is no technical knowledge required to install WordPress. You can install WordPress on localhost very easily and create a free website on WordPress. You can add unlimited new features & functionalities to your WordPress site using different plugins.
Generally, the WordPress plugin works as an add-on for a website. Therefore, plugins typically add new features to your WordPress site to expand added features and bring innovations. So just install & configure the plugin based on your requirement. Here, you can further learn the top 10+ WordPress plugins for business websites.
